Last week, we received a ticket about "We have some use cases where we need to whitelist domains along with a small amount of email". The email list feature in BSK Forms Blacklist handles this situation well. Here, we'll describe how to make Gravity Forms validate email domains.
Let's assume you have BSK Forms Blacklist installed to your WordPress and have activated it.
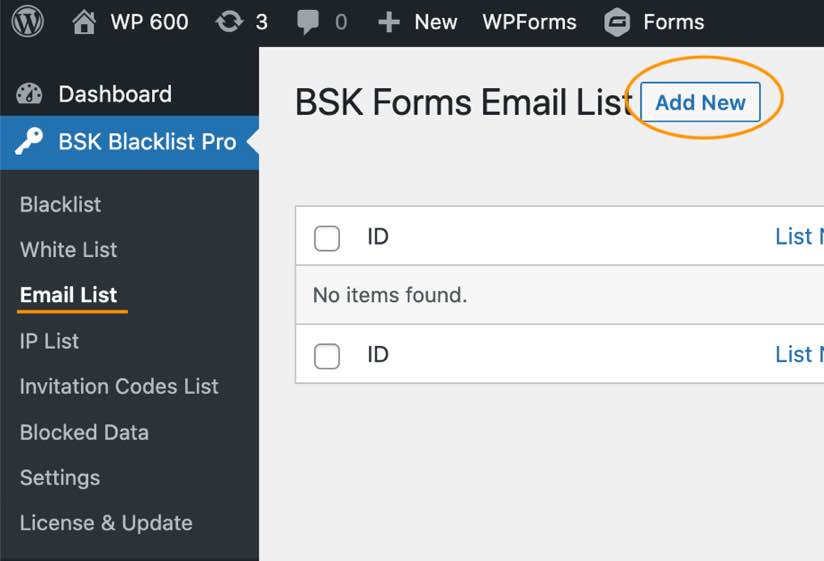
Step 1, create a new email list
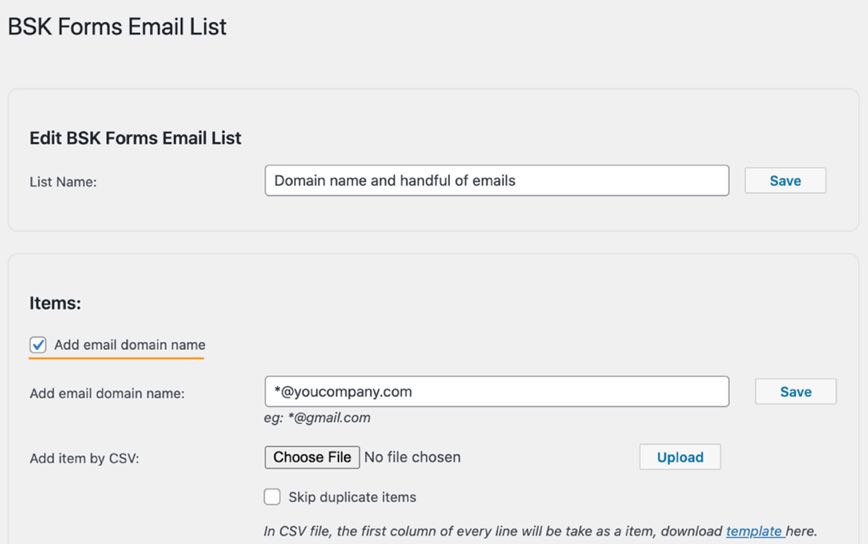
Step 2, add email domain to the list
Please enter a email domain such as *@yourcompany.com
Step 3, import other emails from CSV
The CSV file should only have one column and one email in each row.
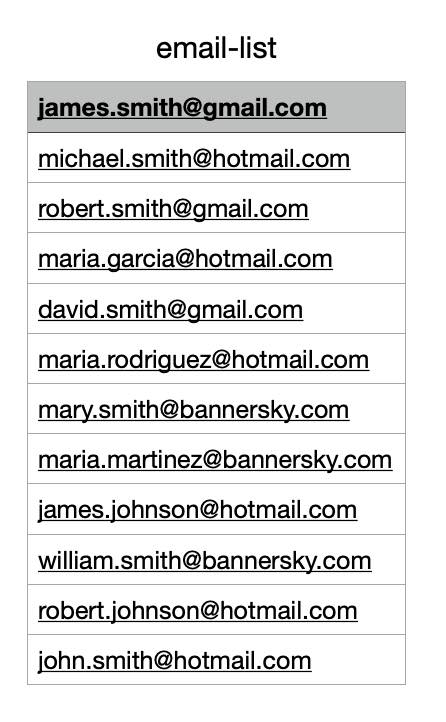
Please check "Skip duplicate items" when upload CSV file to import emails.

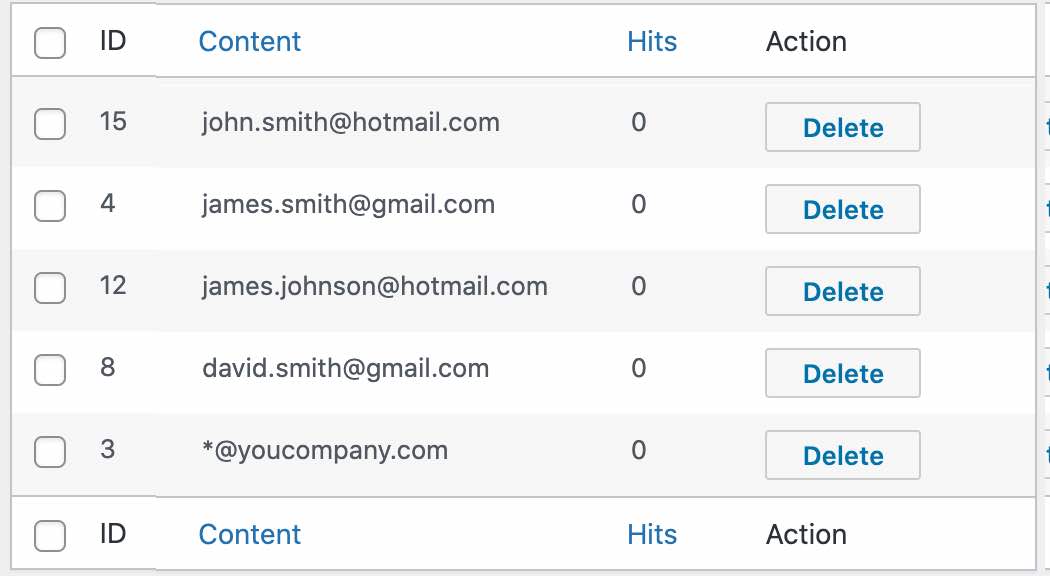
After adding an email domain and importing emails, the list of items looks like this.
Step 4, make sure Gravity Forms is checked on the settings page of BSK Forms Blacklist
Navigate to Dashboard -> BSK Blacklist Pro -> Settings -> General

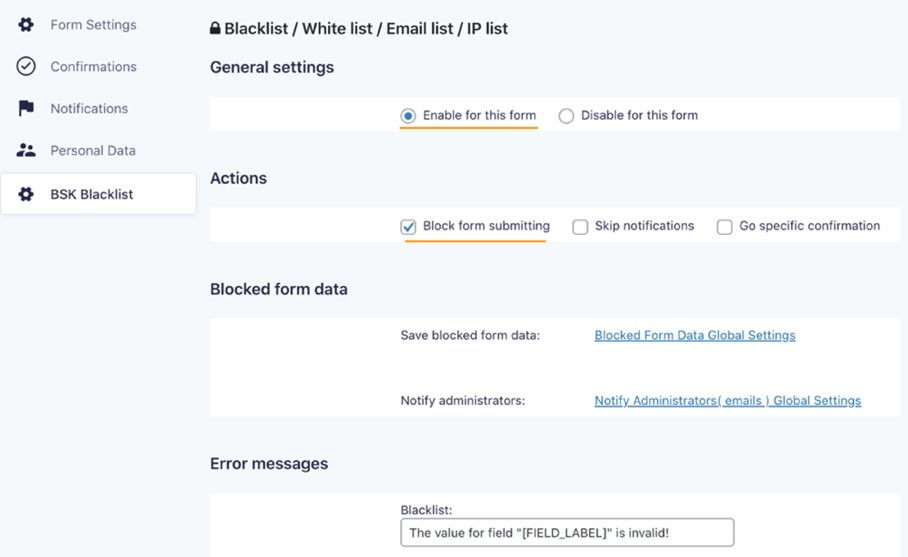
Step 5, enable BSK Forms Blacklist for a Gravity Forms form
Go to the "BSK Blacklist" tab on the Settings of a form.

Check "Enable for this form" and "Block form submitting" as the following.
Step 6, apply the email list to Gravity Forms email field
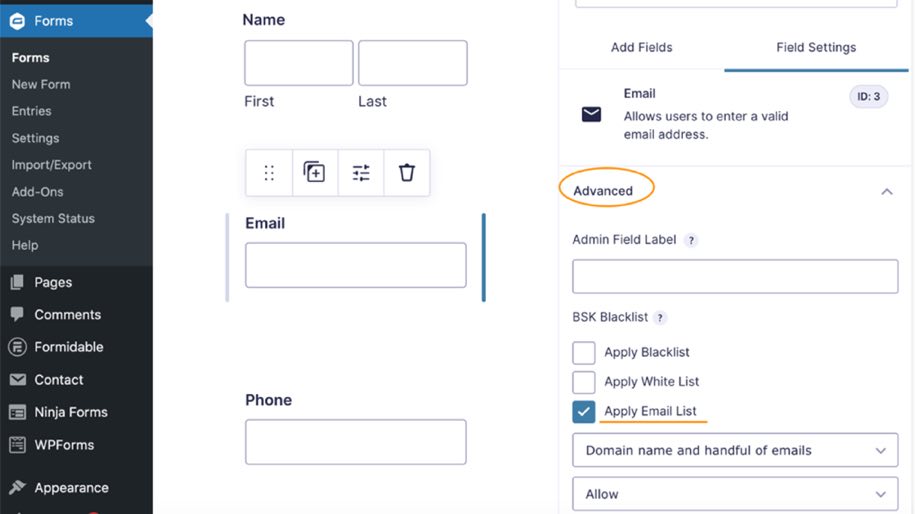
Click on the email field in the Gravity Forms form editing interface, and the "Advanced" tab will appear on the right. Expand the Advanced tab and the BSK Blacklist section appears. Check "Apply Email List", then you can select the email list you created in step 2. Select "Allow" as the action.
With the "Allow" action, only emails in the email list or emails with the domain @yourcompany.com can submit the form.
Don't forget to click "Save Form" button on the top right.
Now, BSK Forms Blacklist make Gravity Forms validate email domain when submit form.
